
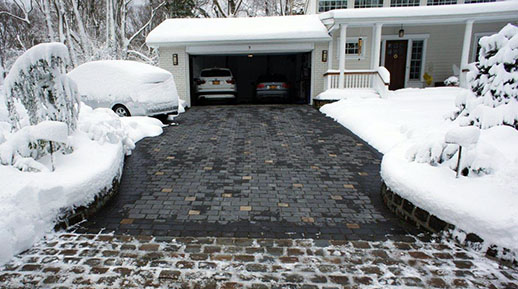
Installing a Snowmelt System under Pavers
Always check the element resistance and the insulation resistance of the heating cable upon receipt and during the installation:
- Upon receipt: Test the cables out of the box and write the values on the warranty card.
- Test the cables after laying them out over the area to be heated. Write the values on the warranty card.
- Test the cables after the embedment. Write the values on the warranty card.
- Record your readings in the installation manual.
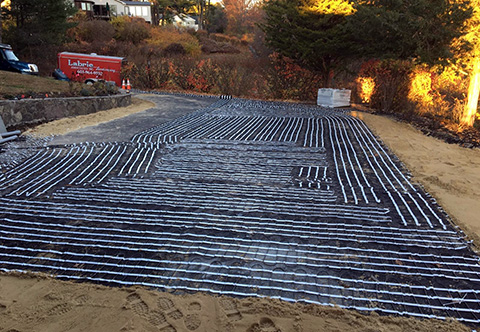
Prior to laying out the heat cable, lay down thin wire mesh over the area to be heated. The wire mesh should be secured to the ground (with landscaping staples or pins) so it will not move during the embedment process. The mesh is used to secure the cable and help ensure proper cable spacing.
Begin the cable installation as close as possible to the contactor panel / electrical source.
Roll out the heating cable or mat and secure it to the wire mesh or grid using plastic zip ties. Heating cables should be securely fastened so they do not move or shift while applying the paver sand and pavers.
DO NOT cut or alter the heating cable. The white binding tape of the heating mats may be cut in order to make turns with the mats, but the heat cable must never be cut or altered.
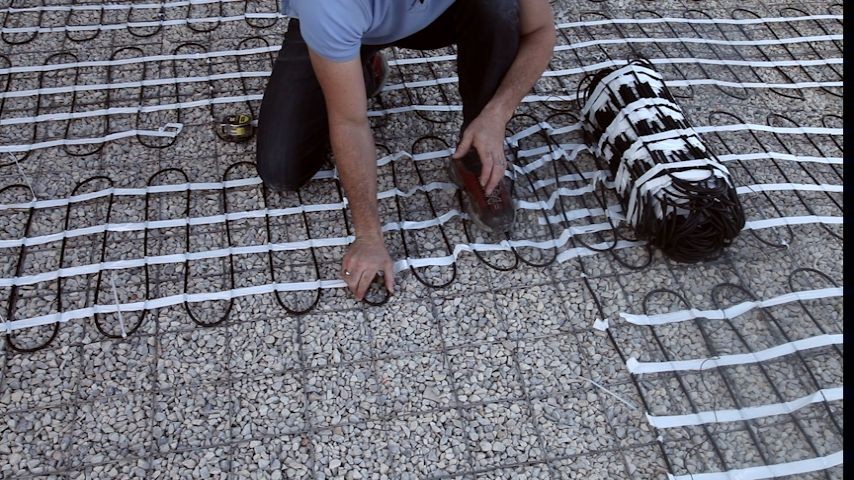
When laying out the cable, DO NOT allow the heating cables to touch, cross, overlap or get bunched up. The cable must maintain a minimum spacing of 2 inches and a maximum of 4 inches.
The minimum spacing for the heating cable is no less than 2-inches center-to-center and no more than 4-inches center-to-center. Make sure cable from adjacent mats also follows the proper spacing guidelines. After securing the heat cable, double check the spacing one last time before adding the top surface of paver sand or dust.
Check with the paver or block manufacturer to determine the proper depth of sand or dust needed for ideal paver installation.
Embed all of the heating cable and the splice in a minimum of 1-inch (½-inch above and ½-inch below) of compacted material such as paver dust or sand. (This may vary depending on the pavers used. Make sure you follow the manufacturer’s guidelines for proper embedment depth.) The cable and splice to the cold lead must be completely embedded. Make sure there are no air gaps around the cable or splice. IMPORTANT NOTE: The gauge of the paver sand, stone dust or base material must be fine enough to completely encapsulate the cable.
Be careful handling the pavers after the cable is laid out. Do NOT drop a brick or stone paver directly on the cable. This can damage the insulation and cause the cable to fail. If a paver is dropped onto a cable, immediately stop the installation and check the integrity of the cable with an ohm reading.
Handle the heating cables carefully. Exercise caution when using tools such as shovels, rakes and wheel barrels so that you do not damage the cables.
Consistently verify the cable integrity by checking the resistance during various stages of the installation.
It is important that this equipment be installed by a licensed and qualified electrician and in accordance with local laws, codes, regulation and in accordance with NEC guidelines.
If installing in permeable pavers or with pavers or blocks greater than 3-inches thick, contact ProLine BEFORE installing.
* This list is intended as a general quick reference guide. It is NOT a substitution for proper training and following the installation manual. Always read and follow the installation manual. Web-based training is available on request.
For more information about installing heated driveways and paver snowmelt systems, visit ProLine’s installation videos web page, or call a ProLine representative today at 866.676.9276.